Become an Author for this blog just by a Click

Followers

No of Visits

Site Meter
Page Rank
Check Google Page Rank

ppl online


Healthy Infos

How To Change Title Tags In Blogger?

Written By avinash on Saturday, October 22, 2011 | 12:36 PM

Its always first name of the blog followed by the name of the post in your browser.This is by default.You should change this as you will get more search engine results.

Why Should I Change My Blogs Title?

Its important for you to change the title which will appear at the top  of the browser.If you don't change this, then there is a possibility of your blogs page rank decreasing. Since it is a habit of reading a text from left to right for everyone, you should have post title followed by the name of your blog.You can change the titles using Html codes.

How will I change the titles?

Here are few ways that I suggest for changing the title.

1) Go to Template---->Edit Html in your blogger dashboard.

2)Press CTRL+F and search for the tag <title><data:blog.pageTitle/></title>


3)Delete the tag and replace it with <b:if cond='data:blog.pageType == &quot;index&quot;'> <title><data:blog.title/></title> <b:else/> <title><data:blog.pageName/> | <data:blog.title/></title> </b:if>


4)Save your template and check for the results in your browser.


5)It will take a few days to change in the search engines,so be patient.


Hope the above information is useful.Any comments,suggestions or queries is most appreciated. You can leave your comments below. Please take 5 seconds to share this post with your friends and families if you like this post.


12:36 PM | 0 comments | Read More

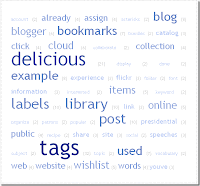
How to add tag Cloud to your blog?

Written By avinash on Wednesday, October 12, 2011 | 2:25 PM

A widget is a simple gadget that will appear in your blog and this will add more flavour to your blog.You can have your own widgets by using HTML codes,Java etc.You can add anything you want in your widget like number of people online in your blog, weather report etc.

Here are few steps that I suggest  to create your own widget.

STEP 1)Add a Labels gadget in your blogger template. If you have already installed then ignore this step.
Go to Layouts and choose any column where you are about to install this new widget
Click on 'Add gadget' button and add the 'label gadget'.

STEP 2) Go to Template --->Edit HTML

NOTE:Click "Expand Widgets Template". It should be in tick mark

STEP 3)Search for <b:widget id='Label1' locked='false' title='Tags' type='Label'/>.If you have a different code then in your browser's search bar or tool search for  type='Label'.

STEP 4) After you search for  type='Label',delete the code in that line and replace with the codes given below.


<b:widget id='Label1' locked='false' title='Tags' type='Label'>
<b:includable id='main'> <b:if cond='data:title'> content' style='text-a<h2><data:title/></h2> </b:if> <div class='widget -lign: justify;'> /javascript'> <script type='tex t


//Settings / Variables
var max = 150; //max css size (in percent)var min = 70; //min css size (in percent) ue for yes, false for no var minCount = 1; // what is the minimumvar showCount = false; // show counts? t r count for a tag to be shown? 1 for all //Begin code: var range = max - min; //Build label Array e/>&quot;); </b:loop> //var labels = new Array(); <b:loop values='data:labels' var='label'> labels.push(&quot;<data:label.na mURLs var urls = new Array(); <b:loop values='data:labels' var='label'> urls.push(&quot;<data:label.url/>&quot;); </b:loop> b:loop> //Counts var counts = new Array(); <b:loop values='data:labels' var='label'> counts.push(&quot;<data:label.count/>&quot;); < / //Number sort funtion (high to low) function sortNumber(a, b) { return b - a;
}


//Make an independant copy of counts for sorting
var sorted = counts.slice();

ar most = sorted.sort(sortNu
//Find the largest tag count

vmber)[0];

//Begin HTML output
for (x in labels)
{
ch&quot; &amp;&amp; counts[x] >= minCount) { //Calculate textSize var textSize = min + Math.fl
if(x != &quot;peek&quot; &amp;&amp; x != &quot;forE
aoor((counts[x]/most) * range);
//Show counts?
if(showCount)
{
var count = &quot;(&quot; + counts[x] + &quot;)&quot;;
}else{
+ urls[x] + &quot;' styl
var count = &quot;&quot;;
}
//Output
document.write(&quot;<span style='font-size:&quot; + textSize + &quot;%'><a href='&quot
;e='text-decoration:none;'>&quot; + labels[x] + count + &quot;</a></span> &quot; );
}
}
</script>
<br/>
Widgets</a></span> </div> </b:includable> </b:widget>
<span style="font-size:80%;float:right;">Powered by <a href="http://www.vikiinfos.blogspot.com">Blogger


STEP 5) Now save your template and you are done.

Check a new attractive tag cloud in your blog like this. Enjoy Blogging!!

Hope the above information is useful.Any comments,suggestions or queries is most appreciated. You can leave your comments below. Please take 5 seconds to share this post with your friends and families if you like this post.


2:25 PM | 2 comments | Read More

How To Add A Reply Option To Blogger Comments?

Written By avinash on Monday, October 3, 2011 | 10:31 PM

What will happen if an individual asks a question in a comment and another individual knows the answer for the question and if your blog doesn't have the option to reply button? Then it could crate a small chaos.Most of the blogs won't have the option to reply button. To eradicate this,I have few ways to solve it. 


STEP 1)In your dashboard go to Design---->'Edit Html'------>and check if the 'Expand Widget templates' box is selected


STEP 2)Find the code in your blogs source page(CTRL+ F and in the search bar find)


<data:commentPostedByMsg/>


 STEP 3)Paste the following codes below or after <data:commentPostedByMsg/> 


<a href='http://www.spiceupyourblog.com'><img alt='Best Blogger Tips' src='https://blogger.googleusercontent.com/img/b/R29vZ2xl/AVvXsEjvk-_3m-0BSUwfoFd7b21Wcqz_5bwMCMeFMBn47iVCIYvU_g-OZwW0s2u59BQCqoT4fY3FCCzz5z6qX4n-yUQr8WsW-nZGiroe6KcbkUGfvSB0LdJYF1l24BKZ1J5IYkxXeT8BIG8S1obp/s1600/best+blogger+tips.png'/></a><span class='comment-reply'><a expr:href='&quot;https://www.blogger.com/comment.g?blogID=YOUR-BLOG-ID&amp;postID=&quot; + data:post.id + &quot;&amp;isPopup=true&amp;postBody=%40%3C%61%20%68%72%65%66%3D%22%23&quot; + data:comment.anchorName + &quot;%22%3E&quot; + data:comment.author + &quot;%3C%2F%61%3E#form&quot;' onclick='javascript:window.open(this.href, &quot;bloggerPopup&quot;, &quot;toolbar=0,location=0,statusbar=1,menubar=0,scrollbars=yes,width=400,height=450&quot;); return false;'>[Reply to comment]</a></span><a href='http://www.bestbloggertemplates.net'><img alt='Best Blogger Templates' src='https://blogger.googleusercontent.com/img/b/R29vZ2xl/AVvXsEjvk-_3m-0BSUwfoFd7b21Wcqz_5bwMCMeFMBn47iVCIYvU_g-OZwW0s2u59BQCqoT4fY3FCCzz5z6qX4n-yUQr8WsW-nZGiroe6KcbkUGfvSB0LdJYF1l24BKZ1J5IYkxXeT8BIG8S1obp/s1600/best+blogger+tips.png'/></a>


NOTE: You must add your blogs Id for the gadget to display on the post.Your blogs Id is a number which will appear in the URL


To find your blogs Id go to the page form which you approach dashboard and copy your blogs ID from the notification bar.


STEP 4)Save your template and check for the option to reply button in your blog.


Hope the above information is useful.Any comments,suggestions or queries is most appreciated. You can leave your comments below. Please take 5 seconds to share this post with your friends and families if you like this post.


Source: spiceupyourblog

10:31 PM | 3 comments | Read More

Floating Back To Top Button For Blogger

Written By avinash on Saturday, October 1, 2011 | 10:02 PM


Many visitors or readers will wish to come to the top of the blog after reading the comments.If the article is long then it would create a problem for the readers.To solve this problem you can add a "GO TO TOP " button in your blog.The button will keep on sliding as the reader scrolls down and whenever the reader wants to go to the top of the page he can simply click on the button which enables him to go to the top of the page.


You can create this button by just adding some codes in Html. Here are the ways for adding the button.


STEP 1: Go to notepad and copy the codes given below in the notepad.


<a href='http:/www.vikiinfos.blogspot.com'><img alt='Best Blogger Tips' src='https://blogger.googleusercontent.com/img/b/R29vZ2xl/AVvXsEjvk-_3m-0BSUwfoFd7b21Wcqz_5bwMCMeFMBn47iVCIYvU_g-OZwW0s2u59BQCqoT4fY3FCCzz5z6qX4n-yUQr8WsW-nZGiroe6KcbkUGfvSB0LdJYF1l24BKZ1J5IYkxXeT8BIG8S1obp/s1600/best+blogger+tips.png'/></a><script type="text/JavaScript">
var topMargin = 300
var slideTime = 1200
var ns6 = (!document.all && document.getElementById);
var ie4 = (document.all);
var ns4 = (document.layers);
window.setInterval("main()", 10)

function floatObject() {
if (ns4 || ns6) {
findHt = window.innerHeight;
} else if(ie4) {
findHt = document.body.clientHeight;
}
}

function main() {
if (ns4) {
this.currentY = document.floatLayer.top;
this.scrollTop = window.pageYOffset;
mainTrigger();
} else if(ns6) {
this.currentY = parseInt(document.getElementById('floatLayer').style.top);
this.scrollTop = scrollY;
mainTrigger();
} else if(ie4) {
this.currentY = floatLayer.style.pixelTop;
this.scrollTop = document.body.scrollTop;
mainTrigger();
}

}
function mainTrigger() {
var newTargetY = this.scrollTop + this.topMargin
if ( this.currentY != newTargetY ) {
if ( newTargetY != this.targetY ) {
this.targetY = newTargetY
floatStart();
}
animator();
}


}
function floatStart() {
var now = new Date()
this.A = this.targetY - this.currentY
this.B = Math.PI / ( 2 * this.slideTime )
this.C = now.getTime()
if (Math.abs(this.A) > this.findHt) {
this.D = this.A > 0 ? this.targetY - this.findHt : this.targetY + this.findHt
this.A = this.A > 0 ? this.findHt : -this.findHt
} else {
this.D = this.currentY
}
}
function animator() {
var now = new Date()
var newY = this.A * Math.sin( this.B * ( now.getTime() - this.C ) ) + this.D
newY = Math.round(newY)
if (( this.A > 0 && newY > this.currentY ) || ( this.A < 0 && newY < this.currentY )) {
if ( ie4 )floatLayer.style.pixelTop = newY
if ( ns4 )document.floatLayer.top = newY
if ( ns6 )document.getElementById('floatLayer').style.top = newY + "px"
}
}
//-->
</script>
<div id="floatLayer" style="position: absolute; height:20px; width:15; left:650px; top:400px; z-index: 100"><a href="#"><img vspace="0" border="0" hspace="0" alt="Back to Top" src=
"https://blogger.googleusercontent.com/img/b/R29vZ2xl/AVvXsEifpGBDA7g5BbuL-5ivEJ3KvnuvnBwm6nEw-hFBnXzownbKCwk6WfIbMd489QOOLxF5hS_HYAJ1sYReanyDPs3Jz9YUbvGDsZSp6ZbGogQW-tiegC6jVlzsSeDI7-2upY3IBXU_CxE8dWQ5/s1600/TOP+BUTTON.gif" title="Back To Top Of Page" /></a></div><a href="http://vikiinfos.blogspot.com" target="_blank"><small>Blogger Top Gadget</small></a>


NOTE: If your button stops at the middle of the page then you have to increase the highlighted number which is at the start of the code.


LEFT 650px: How far from left the button should appear in your blog, you can change the number to your convenience.


RIGHT 400px: How far from top the button should appear in your blog, you can change the number to your convenience.


You can change the image of your button by changing the image URL which is highlighted in dark blue.


Step 2: Save your template and check it in your blog.


Hope the above information is useful.Any comments,suggestions or queries is most appreciated. You can leave your comments below. please take 5 seconds to share this post with your friends and families if you like this post.
10:02 PM | 0 comments | Read More

How to create a favicon for your blog?

A favicon also known as favorite icon is a small icon which appears in the navigation bar.The icon has a 32 x 32 or 16 x16 pixels.A favicon has .ico extension. But this appears only for certain blogs and websites.This favicon icon on the navigation bar won't change the blogs traffic by a huge margin but it will surely improve your blogs appearance. having a favicon icon for your blog will enable readers to bookmark your blog easily.


Here are few steps that I suggest for creating a favicon icon on the navigation bar for your blog or website.


1)Use ADOBE PHOTOSHOP:


Adobe photoshop cannot edit any .ico extension so you have to install a Windows Icon Photoshop Plugin.Once you have installed the Windows icon Photoshop create a 64 x 64 pixel canvas and design a favicon.After designing it you need to resize the image.Go to Image Size--->resample image.This ensures that the image doesn't blur. Now save it as a 16 x 16 image and give the name as "favicon.ico"


There is also an alternate way of creating a favicon icon that is by using Ms paint and web tools


2)Using  Ms paint and web tools and uploading favicon.ico file:


Since favicons are not very big files you can use MS PAINT to create a favicon.Create a JPEG image with 32 x 32 pixels with paint and convert the image into favicon.ico file by using "FAVICON FORM PICS"  in the internet service.Once you have converted the file you have to upload it in now your blog.upload it in the root directory of your blogs.The root directory is a directory where the index file is uploaded.


There are other simple ways to add a Favicon to your blogs. Just Go to this website and create a favicon for your blog. If you Cannot create one for yours there are so many existing favicon which u can use it for your blogs. just download the picture in the ico format and do the following


NOTE:The favicon file will work only if you upload it properly in the root directory.


The last step is just you have to add <link rel="shortcut icon" href="/favicon.ico" type="image/x-icon" /> in the header tag.


If you are undone, u can just go to Layout Tab. You will find favicon gadget and there will be an option called edit. click it and upload the image that you created or downloaded and then save it. 


Just go to your browser and check for the New favicon icon. 


Hope the above information is useful.Any comments,suggestions or queries is most appreciated. You can leave your comments below. please take 5 seconds to share this post with your friends and families if you like this post.

12:37 AM | 0 comments | Read More

From the Author's Desk


Vignesh, the founder of VikiInfos, is a Commerce Graduate and Pursuing his Chartered Accountant Profession, now in the Intermediate level. Blogging is his hobby and likes to share things. He plans to Update this blog with latest happenings and things that he gets to know at times and worthy information.a friendly user blog can be followed by any person. Join us free and subscribe.
Feel free to say hi to me, or follow @vikiinfos on twitter.


Support US to support YOU!
Dono How To Donate? Click here
Creative Commons License
Healthy Infos... by Vignesh is licensed under a Creative Commons Attribution-NoDerivs 3.0 Unported License.
Based on a work at vikiinfos.blogspot.com.
 
Twitter Bird Gadget